
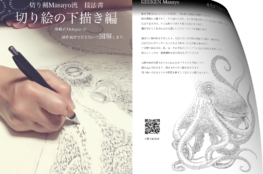
私の切り絵制作におけるオリジナル技法をこれまで切り絵作業中に撮ってきた作業風景の写真を交えながら、このブログにて解説しようと思っています。私の切り絵作品の制作方法が良く分かりると思います。私の作品に興味がある方は是非読んでみててください。『切り抜き編』切り抜き1・切り抜き2です/I’m going to explain on my blog this original technique in my cut-out production, along with pictures of the work landscapes I have taken during the cut-out work. I think you can understand how to make my cut-out works. If you are interested in my work, please read it. “CUTOUT” Cutout 1 and Cutout 2
ご質問がありましたら、コメント欄にどうぞよろしくお願い致します。/If you have any questions, thank you in the comments section.
目次
Page 11~12 いろいろな道具
クリックすると画像が拡大します。/Click to enlarge the image.
-3.jpg)
本文
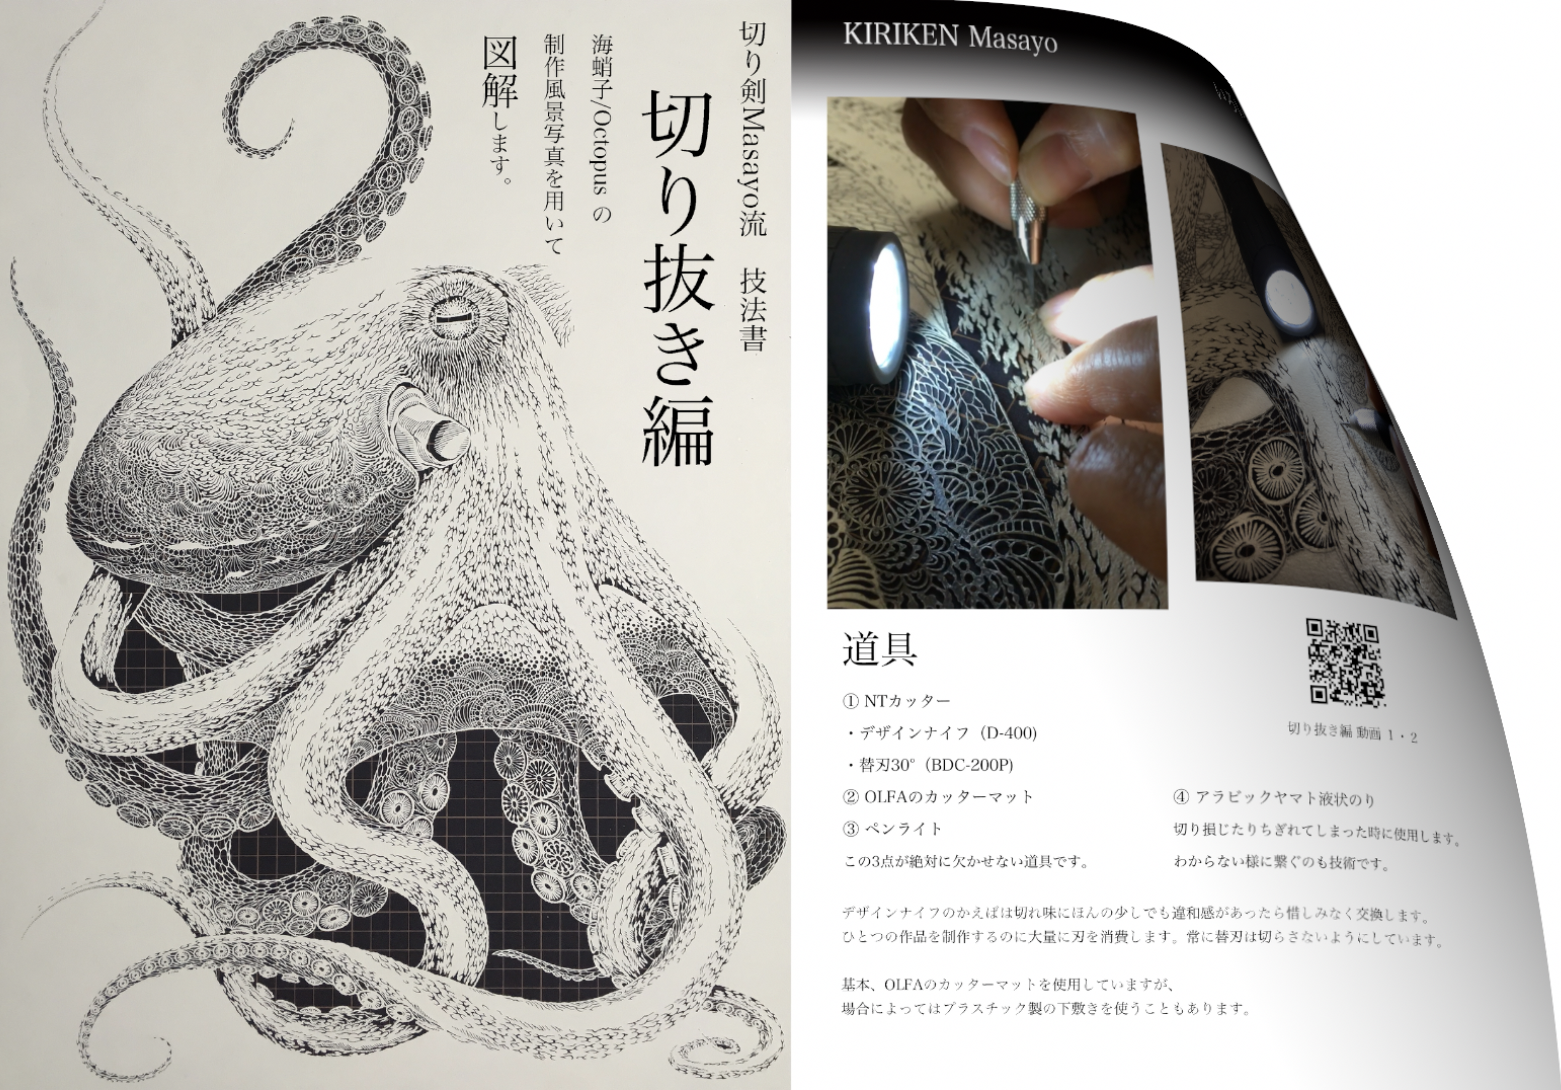
道具
① NTカッター ・デザインナイフ(D-400) ・替刃30°(BDC-200P) ② OLFAのカッターマット ③ ペンライト
この3点が絶対に欠かせない道具です。
④ アラビックヤマト液状のり
切り損じたりちぎれてしまった時に使用します。 わからない様に繋ぐのも技術です。
デザインナイフのかえばは切れ味にほんの少しでも違和感があったら惜しみなく交換します。 ひとつの作品を制作するのに大量に刃を消費します。常に替刃は切らさないようにしています。 基本、OLFAのカッターマットを使用していますが、 場合によってはプラスチック製の下敷きを使うこともあります。
Google Translation
Tool
① NT cutter ・ Design knife (D-400) ・ Replacement blade 30 ° (BDC-200P) ② OLFA cutter mat ③ Pen light
These three points are absolutely essential tools.
④ Arabic Yamato Liquid Glue
Used when cut or torn. It is also a technology to connect so that it does .
If the design knives feel a little uncomfortable with the sharpness, they will be replaced without hesitation. A large amount of blades are consumed to produce one piece. I always try not to cut the blade. Basically, OLFA cutter mats are used, but in some cases,stationery plastic mats are also used.
切り抜き編 1・2 動画
実際に切っている映像です。どうんな風に切っているかわかると思います。/This is the video that is actually cut. You can see how it ’s cut.![]()
Page 13~14 紙
本文
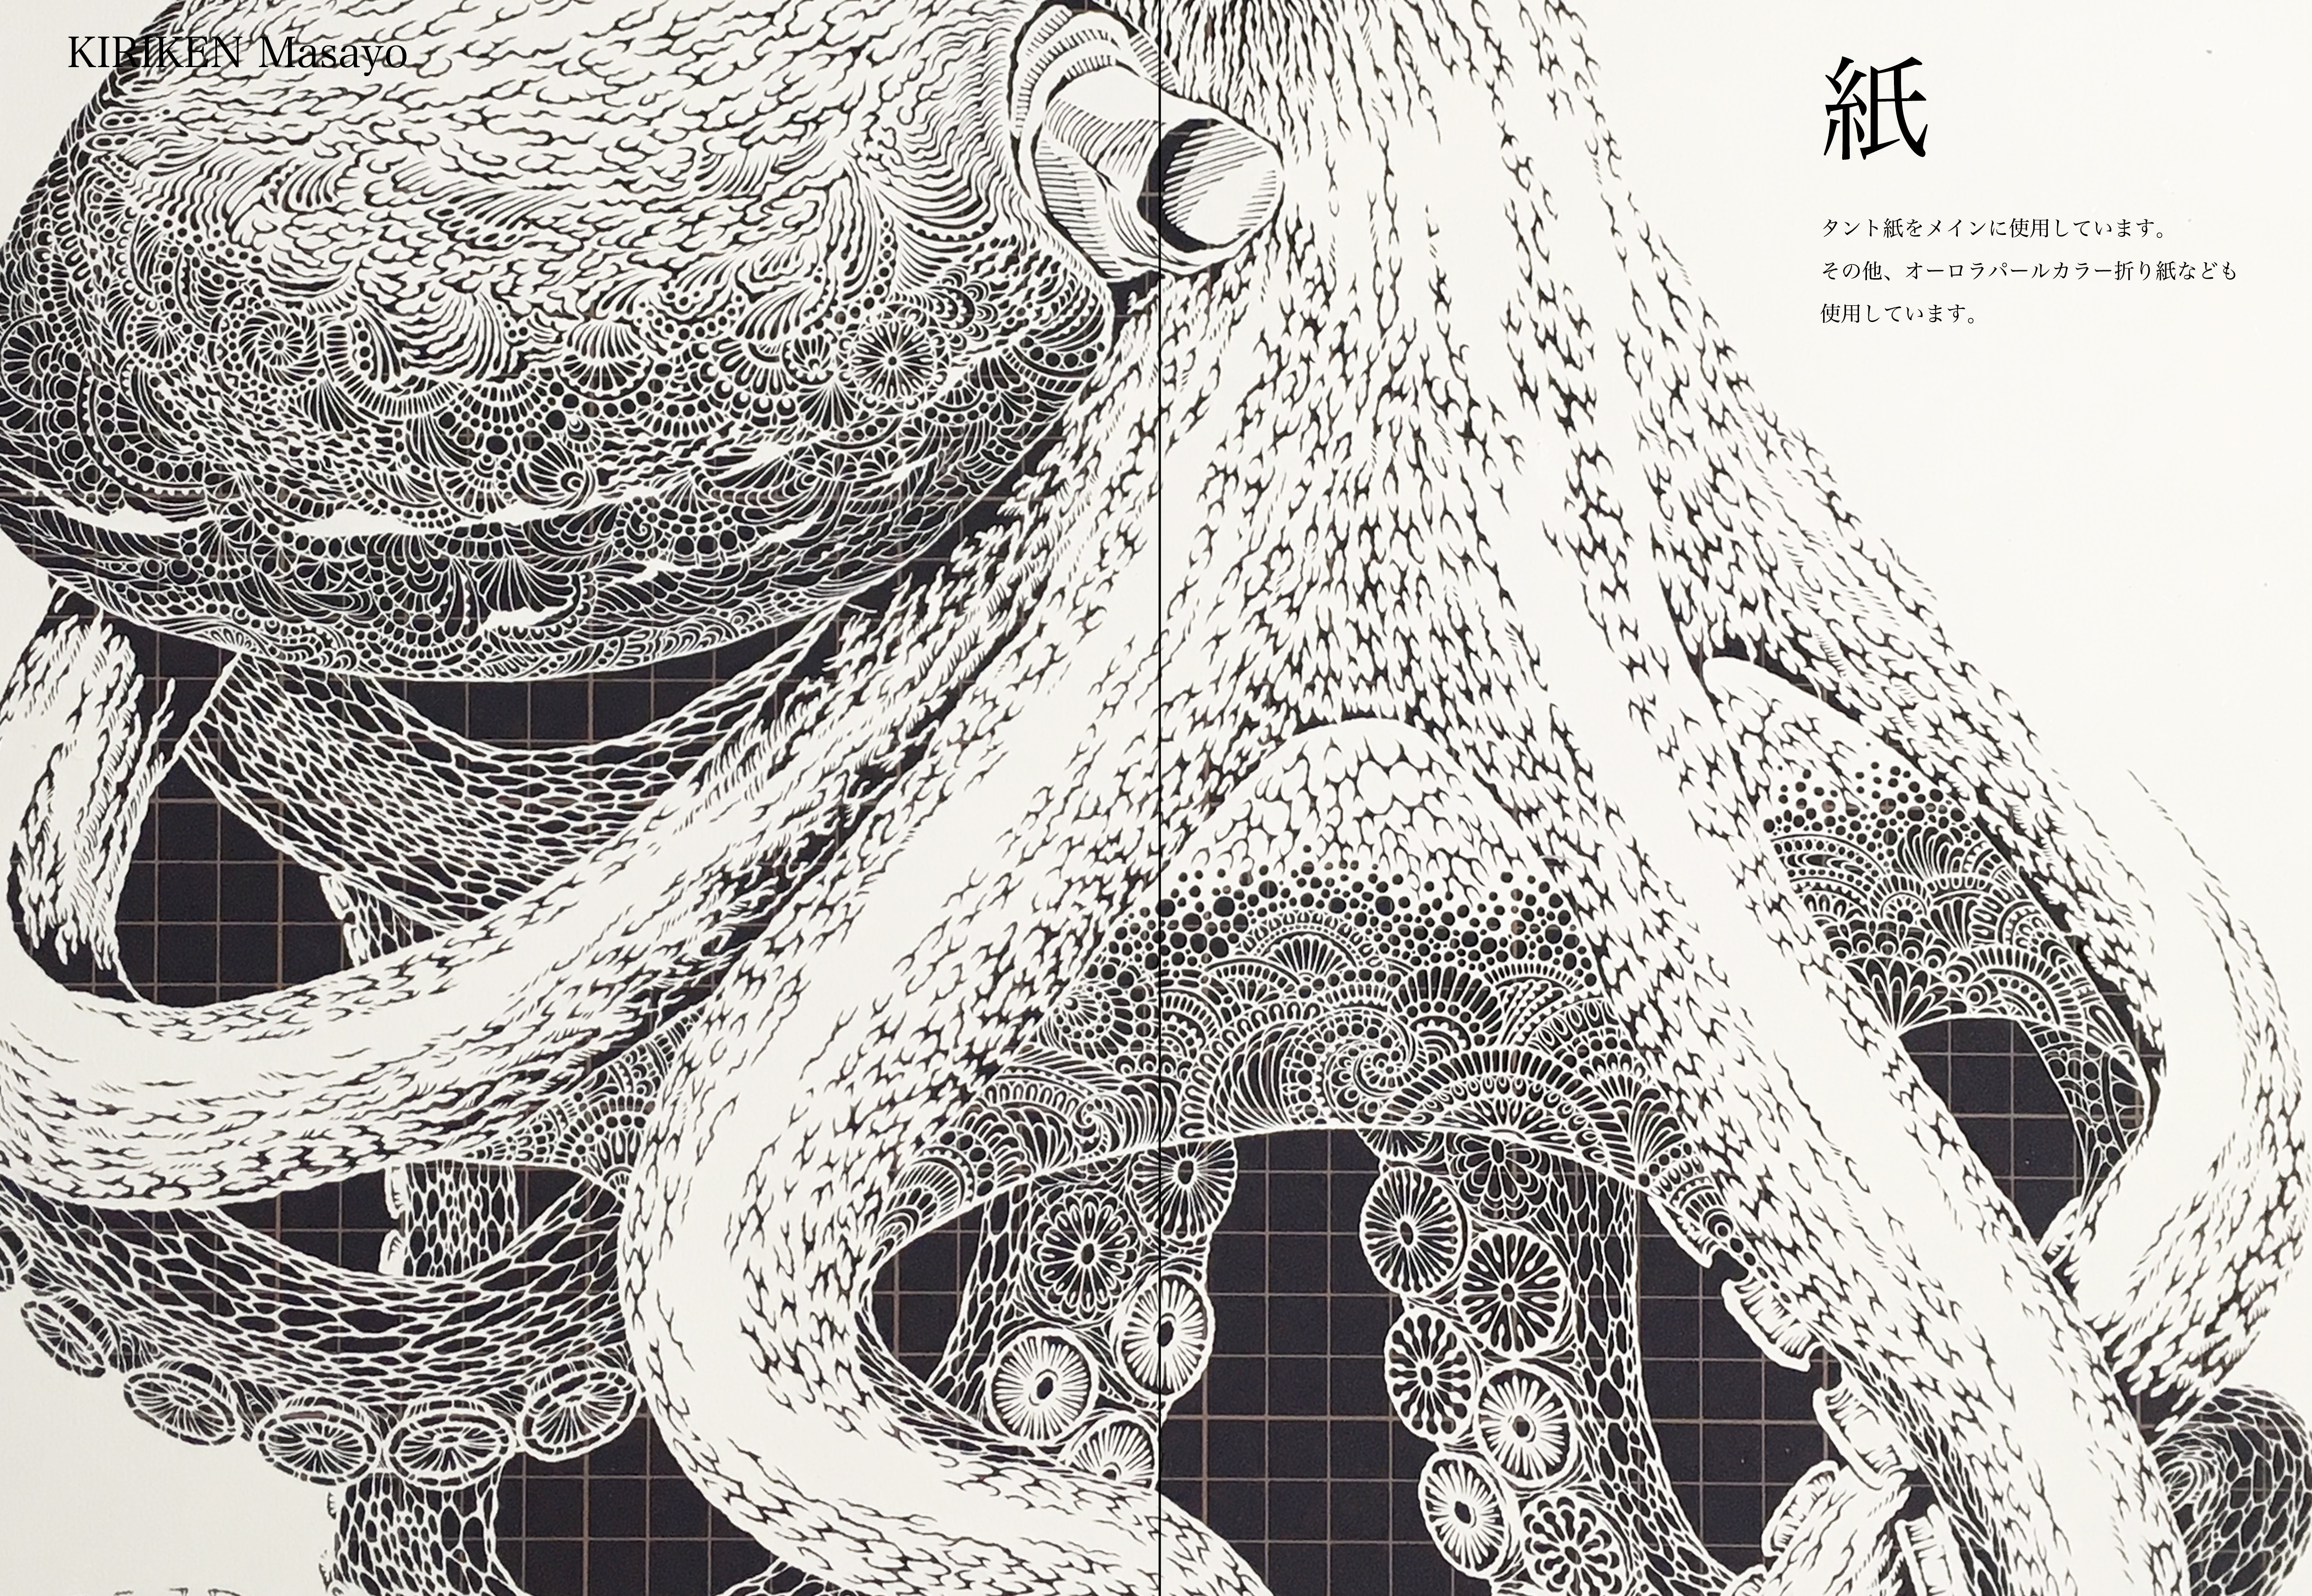
紙
タント紙をメインに使用しています。 その他、オーロラパールカラー折り紙なども 使用しています。
Google Translation
paper
Tanto paper is mainly used.
In addition, aurora pearl color origami etc.
I’m using.
Page 15~16 切り抜き図案
クリックすると画像が拡大します。/Click to enlarge the image.

本文
通常
下描きをした図案を直接切り抜く。完成した切り絵はひっくり返した面になります。
もう一枚
同じ下描きの切り絵を制作する場合は、
1 完成した切り絵をスキャナーやカメラで撮る。
2 Photoshopで撮った画像データを開く
3 切り抜く面は図案を直接切り抜くため、画像データ を左右反転する。(完成品はひっくり返した面)
4 作業をし易くするために画像データをPhotoshopの 「不透明度」という機能を使って画像全体を薄くします。
5 プリンターを使って使用する紙(タント紙など)に 直接印刷します。
6 プリントした面を直接切り抜きます。
Google Translation
Normal
Cut out the draft design directly. The completed paper-cut will be turned over.
Another piece
If you want to create the same draft cutout,
1 Take the completed paper cut with a scanner or camera.
2 Open image data taken with Photoshop
3 In order to cut out the design directly, the image data is reversed left and right. (The finished product is upside down)
4 To make the work easier, use the “Opacity” function of Photoshop to thin the entire image.
5 Print directly on paper (tant paper, etc.) to be used with the printer.
6 Cut out the printed surface directly.
Page 17~18 切り抜きの基本
クリックすると画像が拡大します。/Click to enlarge the image.
本文
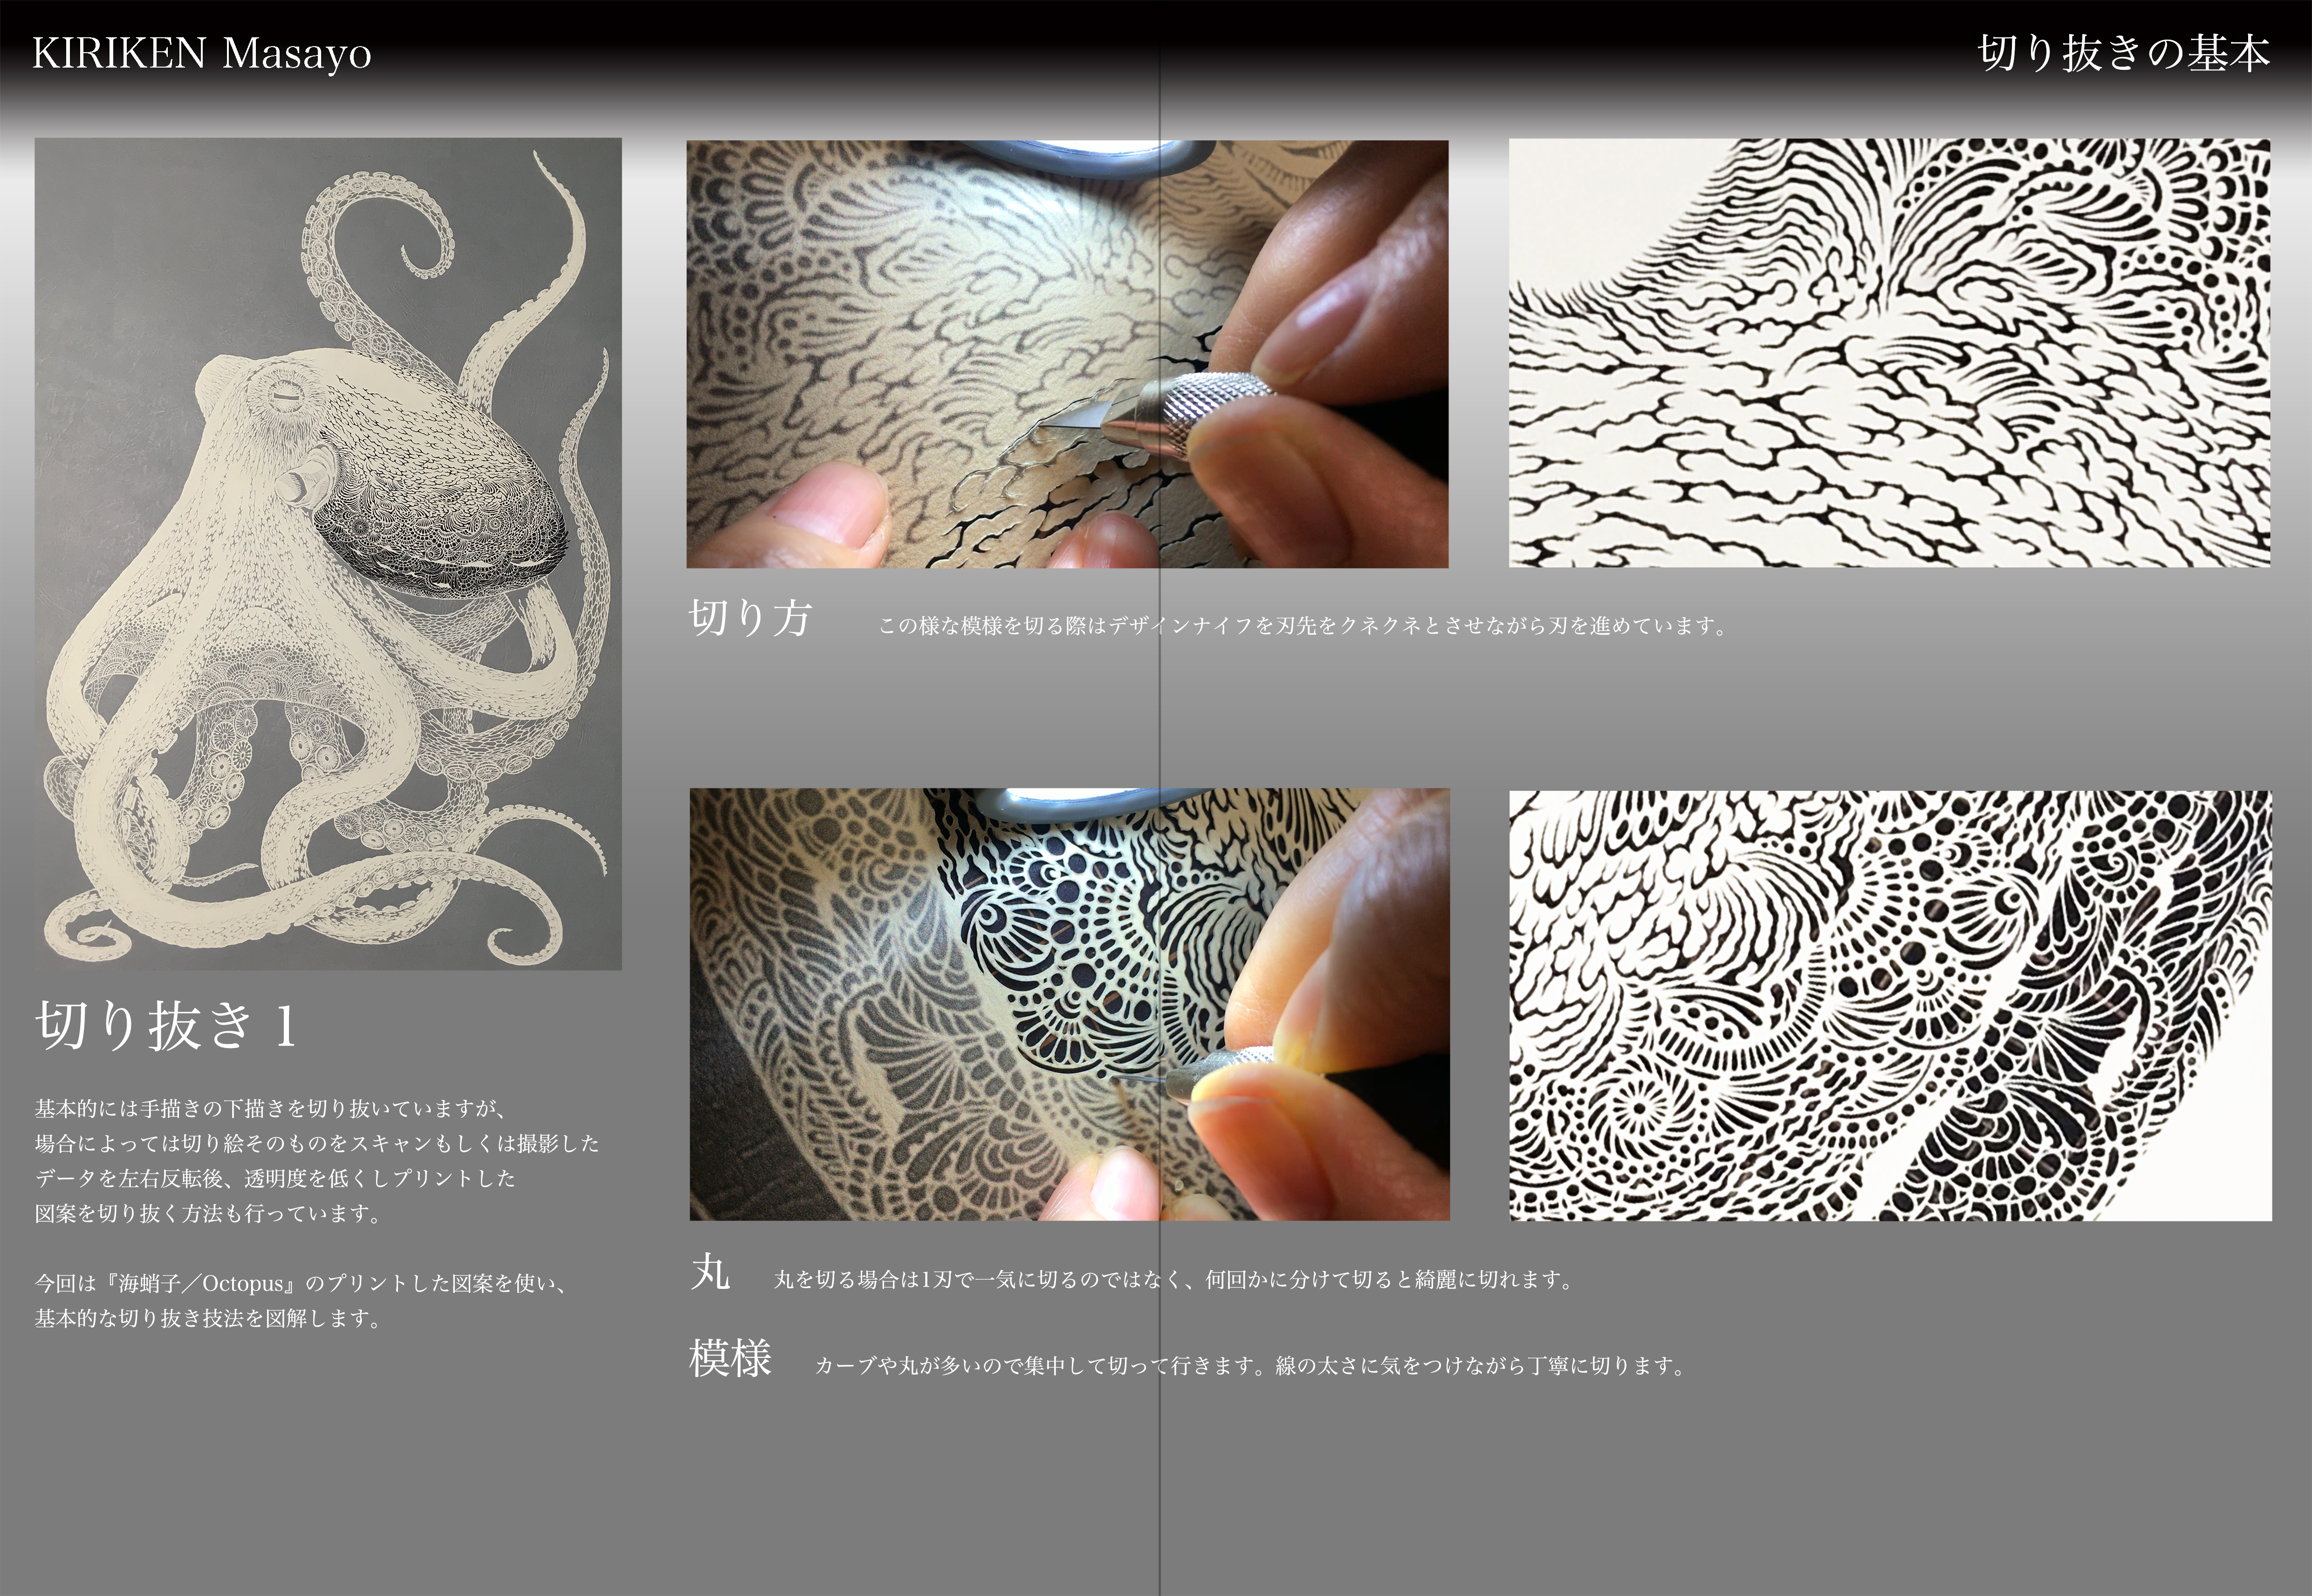
切り抜き1
基本的には手描きの下描きを切り抜いていますが、 場合によっては切り絵そのものをスキャンもしくは撮影した データを左右反転後、透明度を低くしプリントした 図案を切り抜く方法も行っています。 今回は『海蛸子/Octopus』のプリントした図案を使い、 基本的な切り抜き技法を図解します。
切り方 この様な模様を切る際はデザインナイフを刃先をクネクネとさせながら刃を進めています。
丸 丸を切る場合は1刃で一気に切るのではなく、何回かに分けて切ると綺麗に切れます。
模様 カーブや丸が多いので集中して切って行きます。線の太さに気をつけながら丁寧に切ります。
Google Translation
Cutout 1
Basically, hand-drawn drafts are cut out, but in some cases, the cut-out drawings themselves are scanned or photographed. After the data is flipped horizontally, the transparency is lowered and the printed design is cut out. This time, I will use the design printed by “Octopus” to illustrate the basic clipping technique.
How to cut When cutting such a pattern, the blade is advanced while the design knife is used as the blade tip.
Maru When cutting a circle, do not cut it with one blade at a stretch, but cut it several times to cut it cleanly.
Since there are a lot of patterns and circles, I will concentrate and cut. Cut carefully while paying attention to the thickness of the line.
Page 19~20 しっかり押える
クリックすると画像が拡大します。/Click to enlarge the image.
本文
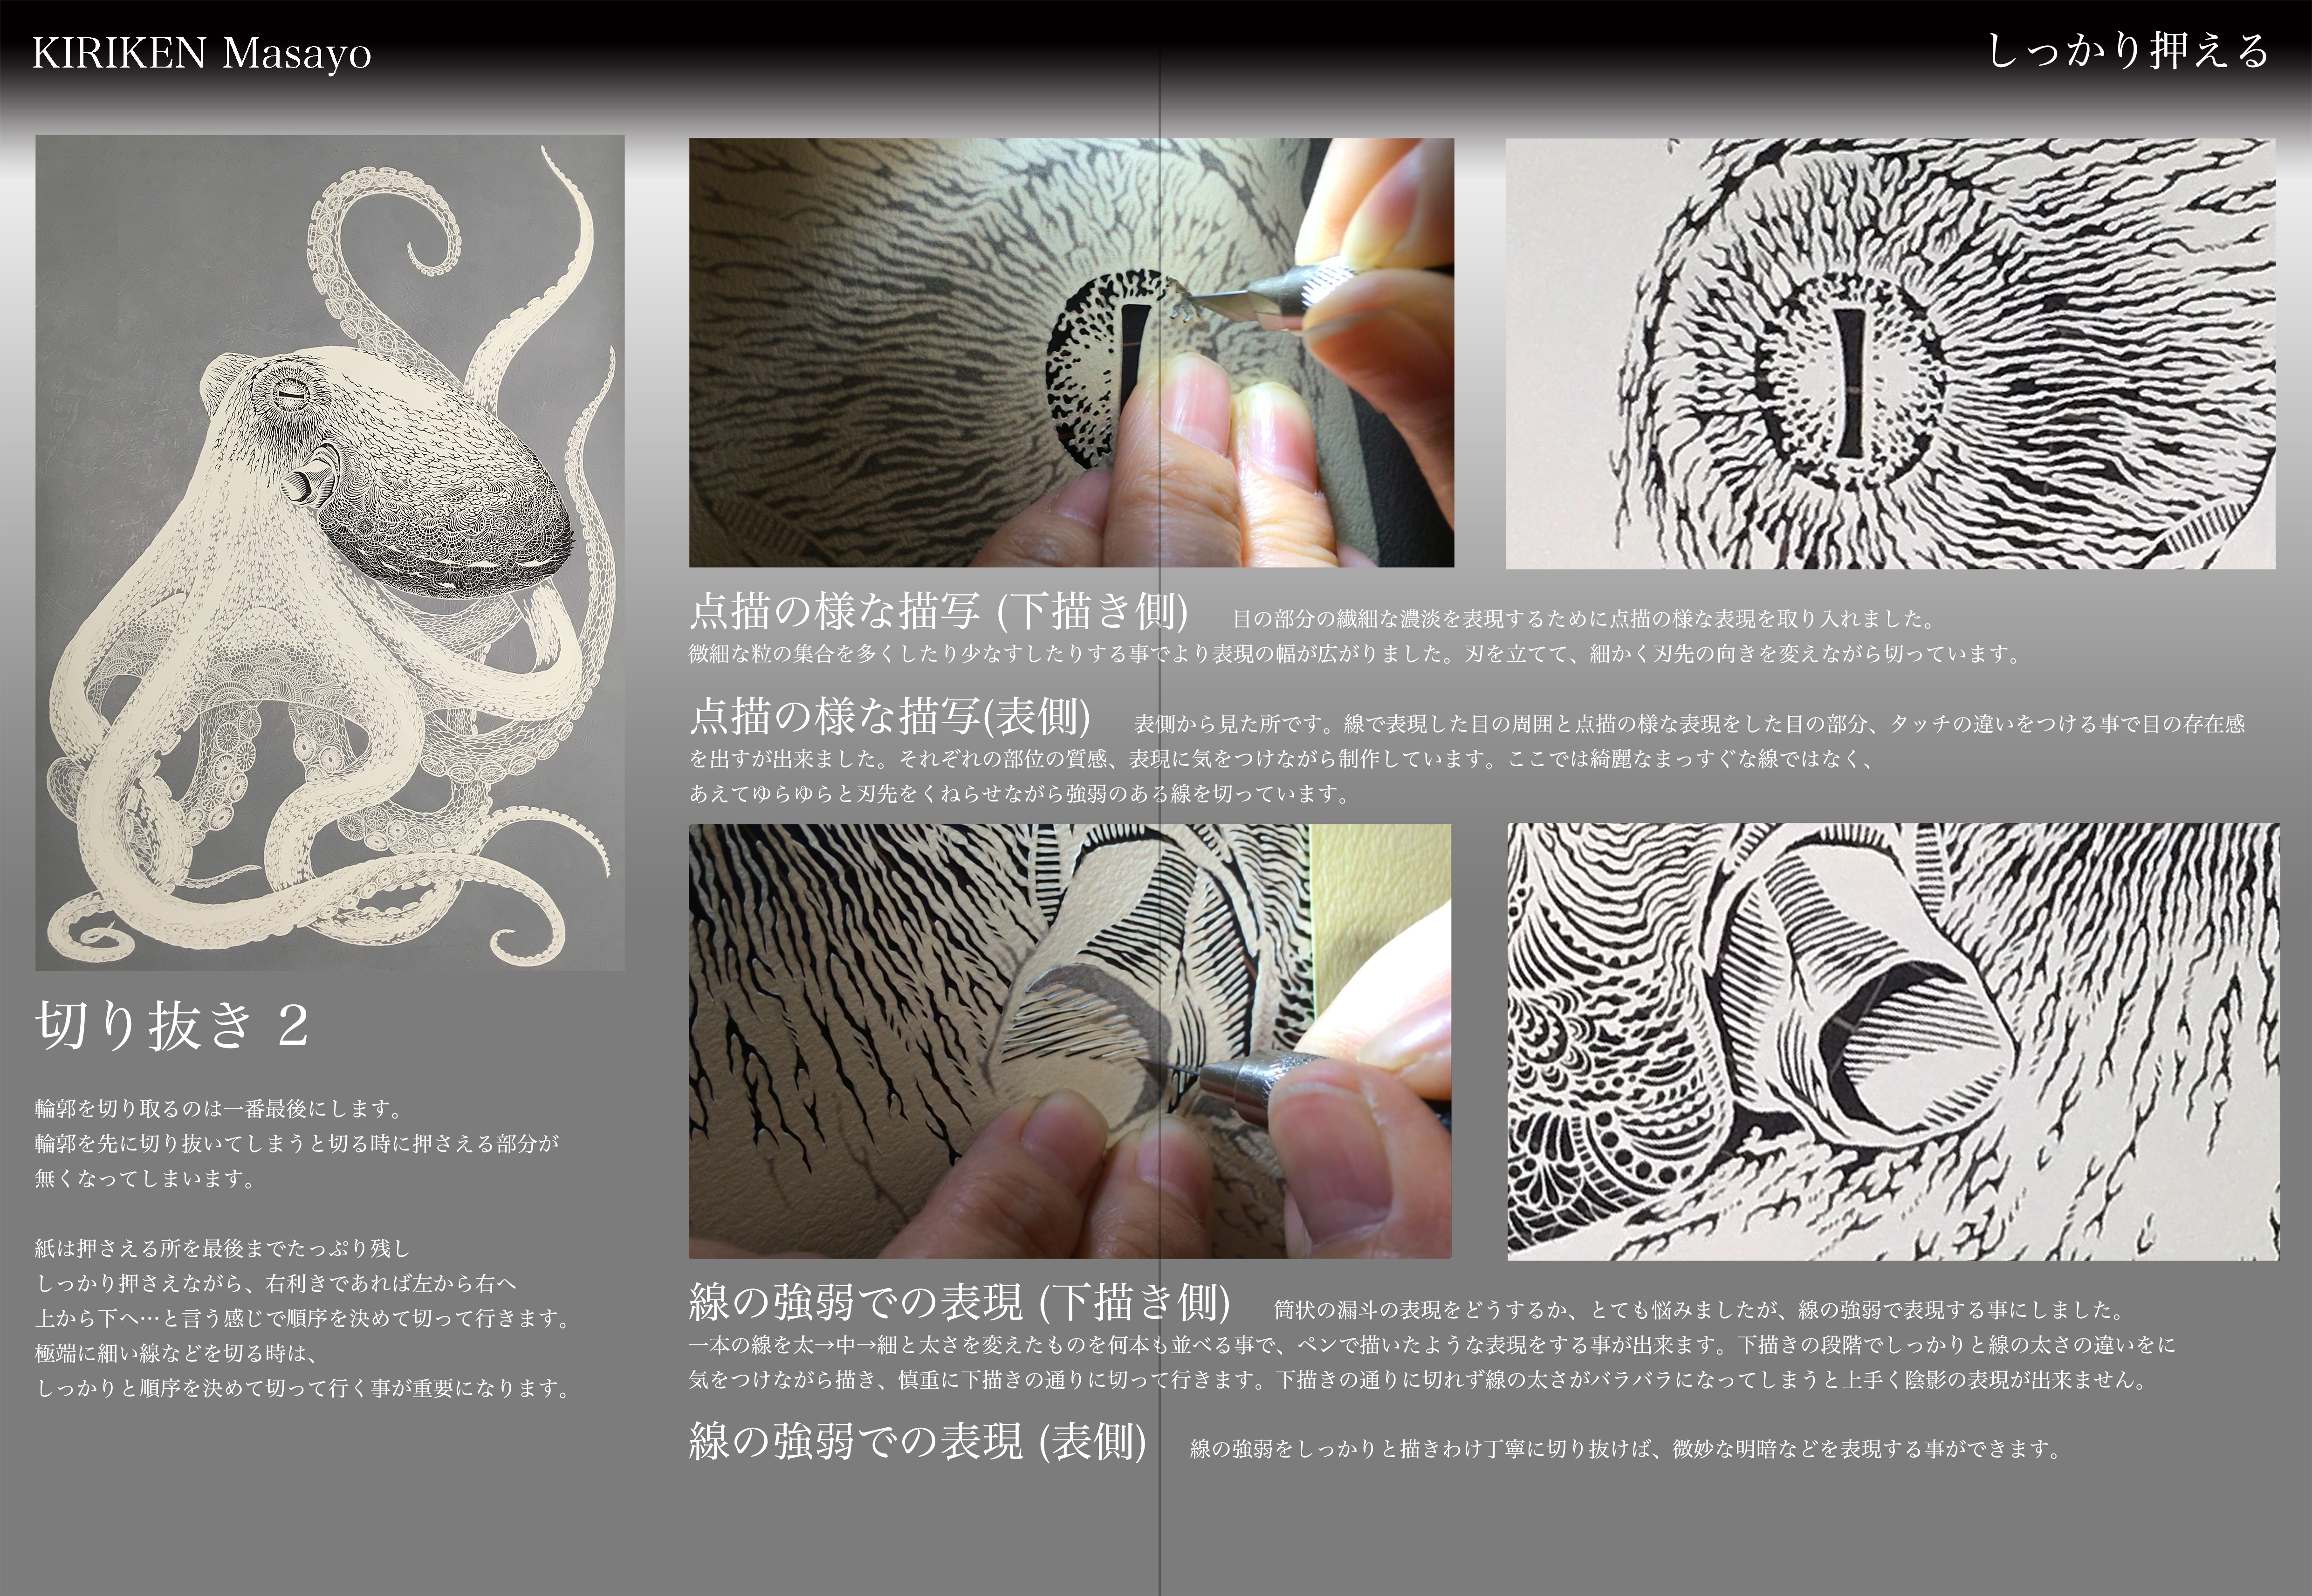
切り抜き 2
輪郭を切り取るのは一番最後にします。 輪郭を先に切り抜いてしまうと切る時に押さえる部分が 無くなってしまいます。 紙は押さえる所を最後までたっぷり残し しっかり押さえながら、右利きであれば左から右へ 上から下へ…と言う感じで順序を決めて切って行きます。 極端に細い線などを切る時は、 しっかりと順序を決めて切って行く事が重要になります。
点描の様な描写 (下描き側) 目の部分の繊細な濃淡を表現するために点描の様な表現を取り入れました。 微細な粒の集合を多くしたり少なすしたりする事でより表現の幅が広がりました。刃を立てて、細かく刃先の向きを変えながら切っています。
点描の様な描写(表側) 表側から見た所です。線で表現した目の周囲と点描の様な表現をした目の部分、タッチの違いをつける事で目の存在感 を出すが出来ました。それぞれの部位の質感、表現に気をつけながら制作しています。ここでは綺麗なまっすぐな線ではなく、 あえてゆらゆらと刃先をくねらせながら強弱のある線を切っています。
線の強弱での表現 (下描き側) 筒状の漏斗の表現をどうするか、とても悩みましたが、線の強弱で表現する事にしました。 一本の線を太→中→細と太さを変えたものを何本も並べる事で、ペンで描いたような表現をする事が出来ます。下描きの段階でしっかりと線の太さの違いをに 気をつけながら描き、慎重に下描きの通りに切って行きます。下描きの通りに切れず線の太さがバラバラになってしまうと上手く陰影の表現が出来ません。
線の強弱での表現 (表側) 線の強弱をしっかりと描きわけ丁寧に切り抜けば、微妙な明暗などを表現する事ができます。
Google Translation
Cutout 2
Cut the contour last. If you cut out the contour first, there will be no part to hold when cutting. Leave plenty of paper to hold down to the end. If you are right-handed, turn left to right and top to bottom. When cutting extremely thin lines, it is important to determine the order firmly.
Stippling-like depiction (draft side) Incorporating stippling-like expression to express the delicate shades of the eyes. The range of expression has been expanded by increasing or decreasing the collection of fine grains. The blade is set up and cut while changing the direction of the blade.
Description like pointillism (front side) Viewed from the front side. The presence of the eye was able to be brought out by making a difference in the touch around the eyes expressed with lines and the part of the eyes expressed like pointillism. We produce while paying attention to the texture and expression of each part. This is not a clean straight line, but dares to cut a strong line while twisting the blade edge.
Expression with the strength of the line (draft side) I was very worried about what to do with the expression of the cylindrical funnel, but I decided to express it with the strength of the line. By arranging many lines with thick, medium, thin, and thin lines, you can express as if you were drawing with a pen. Draw carefully while paying attention to the difference in line thickness at the stage of drafting, and carefully cut as shown in the draft. If the thickness of the line falls apart as shown in the drawing, shadows cannot be expressed well.
Expression in line strength (front side) If you draw the strength of the line firmly and carefully, you can express subtle contrasts.
2019-09-23
Appreciate the recommendation. Will try it out.
2020-02-27
Every weekend i used to pay a visit this site, because i want enjoyment, for the reason that this this
site conations actually fastidious funny information too.
2021-01-08
Hi,Thank you for your comment.
2020-10-24
Ahaa, its pleasant conversation about this article here at this web site,
I have read all that, so at this time me also commenting here.